
H-Log
[python] Django Form 생성 본문
반응형
사용자로부터 서버로 데이터를 저장하도록 해보자
우선 template의 detail.html을 수정해주자
<form action="{% url 'polls:vote' question.id %}" method="post">
{% csrf_token %}
<fieldset>
    <legend><h1>{{ question.question_text }}</h1></legend>
    {% if error_message %}<p><strong>{{ error_message }}</strong></p>{% endif %}
    {% for choice in question.choice_set.all %}
        <input type="radio" name="choice" id="choice{{ forloop.counter }}" value="{{ choice.id }}">
        <label for="choice{{ forloop.counter }}">{{ choice.choice_text }}</label><br>
    {% endfor %}
</fieldset>
<input type="submit" value="Vote">
</form>
그리고 views에서 vote함수를 아래와 같이 작성한다
from django.shortcuts import get_object_or_404, render
from django.http import HttpResponse, HttpResponseRedirect
from django.urls import reverse

from .models import Question

~
~
~

def vote(request, question_id):
    question = get_object_or_404(Question, pk=question_id)
    try:
        selected_choice = question.choice_set.get(pk=request.POST['choice'])
    except (KeyError, Choice.DoesNotExist):
        return render(request, 'polls/detail.html', {
            'question': question,
            'error_message': "You didn't select a choice.",
        })
    else:
        selected_choice.votes += 1
        selected_choice.save()
    return HttpResponseRedirect(reverse('polls:results', args=(question.id,)))
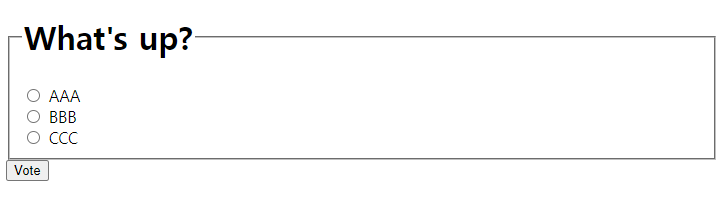
그리고 reuserver로 화면을 확인해보면 detail페이지가 변경된걸 볼 수 있다
html 코드 살펴보기
<form action="{% url 'polls:vote' question.id %}" method="post">
    {% csrf_token %}
    <fieldset>
        <legend><h1>{{ question.question_text }}</h1></legend>

        <!-- 에러가 있을 시 에러 메세지 출력 -->
        {% if error_message %}<p><strong>{{ error_message }}</strong></p>{% endif %}

        <!-- 선택지 출력 -->
        {% for choice in question.choice_set.all %}
            <input type="radio" name="choice" id="choice{{ forloop.counter }}" value="{{ choice.id }}">
            <label for="choice{{ forloop.counter }}">{{ choice.choice_text }}</label><br>
        {% endfor %}
    </fieldset>
    <input type="submit" value="Vote">
</form>
- 이전에는 단순 리스트로 선택지가 출력이 되었었는데, 지금은 서버로 데이터를 보내기 위해 form태그와 input으로 바뀌었다.
- form태그의 속성을 보면 submit시 polls/vote/ 인 url로 post하라고 명시되어있다.
- 해당 페이지로 데이터를 전송하면, 그 페이지에서는 서버에 저장하는 작업을 해주면 된다.
- csrf_token : 해킹을 막기 위한 코드이다. form태그 안에 항상 넣어주는게 좋다
views의 vote함수 살펴보기
def vote(request, question_id):

		# 에러처리
    question = get_object_or_404(Question, pk=question_id)

	  # 에러가 없으면 try
    try:
				# 사용자 선택한 선택지가 갖고있는 질문Key값을 통해 question에서 질문 추출
        selected_choice = question.choice_set.get(pk=request.POST['choice'])

		except (KeyError, Choice.DoesNotExist):
				# 예외처리(선택지가 없을 떄) 다시 상세페이지로 이동 후 에러 메세지 전송
        return render(request, 'polls/detail.html', {
            'question': question,
            'error_message': "You didn't select a choice.",
        })
    else:
				# 데이터가 있는 경우 실행
        selected_choice.votes += 1
        selected_choice.save()
		    return HttpResponseRedirect(reverse('polls:results', args=(question.id,)))
- HttpResponseRedirect : POST와 세트. POST로 호출된 경우에 사용
- reverse : url하드코딩을 하지 않기 위해 사용. polls앱의 results view를 호출
result view와 template 생성
views.py 수정
vote 함수에서 polls/result 페이지를 열 때 args=(question.id,) 를 통해 질문 id값을 넘겨주게 된다
해당 내용을 result.html에도 같이 보내준다.
from django.shortcuts import get_object_or_404, render

def results(request, question_id):
    question = get_object_or_404(Question, pk=question_id)
    return render(request, 'polls/result.html', {'question': question})
result.html 생성
<h1>{{ question.question_text }}</h1>

<ul>
{% for choice in question.choice_set.all %}
    <li>{{ choice.choice_text }} -- {{ choice.votes }} vote{{ choice.votes|pluralize }}</li>
{% endfor %}
</ul>

<a href="{% url 'polls:detail' question.id %}">Vote again?</a>
- vote{{ choice.votes|pluralize }} : 단수/복수 처리 기능 (django의 기능)
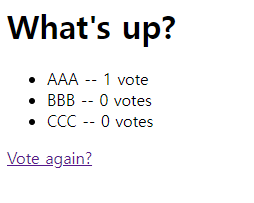
완성 창을 확인해보자
어떤 선택지가 몇 번 투표됐는지 확인할 수 있다.
또한 1인 경우 단수처리, 0 또는 1이상일 경우에는 복수처리가 되도록 잘 셋팅되었다
우선 template의 detail.html을 수정해주자
<form action="{% url 'polls:vote' question.id %}" method="post">
{% csrf_token %}
<fieldset>
    <legend><h1>{{ question.question_text }}</h1></legend>
    {% if error_message %}<p><strong>{{ error_message }}</strong></p>{% endif %}
    {% for choice in question.choice_set.all %}
        <input type="radio" name="choice" id="choice{{ forloop.counter }}" value="{{ choice.id }}">
        <label for="choice{{ forloop.counter }}">{{ choice.choice_text }}</label><br>
    {% endfor %}
</fieldset>
<input type="submit" value="Vote">
</form>
그리고 views에서 vote함수를 아래와 같이 작성한다
from django.shortcuts import get_object_or_404, render
from django.http import HttpResponse, HttpResponseRedirect
from django.urls import reverse

from .models import Question

~
~
~

def vote(request, question_id):
    question = get_object_or_404(Question, pk=question_id)
    try:
        selected_choice = question.choice_set.get(pk=request.POST['choice'])
    except (KeyError, Choice.DoesNotExist):
        return render(request, 'polls/detail.html', {
            'question': question,
            'error_message': "You didn't select a choice.",
        })
    else:
        selected_choice.votes += 1
        selected_choice.save()
    return HttpResponseRedirect(reverse('polls:results', args=(question.id,)))
그리고 reuserver로 화면을 확인해보면 detail페이지가 변경된걸 볼 수 있다
html 코드 살펴보기
<form action="{% url 'polls:vote' question.id %}" method="post">
    {% csrf_token %}
    <fieldset>
        <legend><h1>{{ question.question_text }}</h1></legend>

        <!-- 에러가 있을 시 에러 메세지 출력 -->
        {% if error_message %}<p><strong>{{ error_message }}</strong></p>{% endif %}

        <!-- 선택지 출력 -->
        {% for choice in question.choice_set.all %}
            <input type="radio" name="choice" id="choice{{ forloop.counter }}" value="{{ choice.id }}">
            <label for="choice{{ forloop.counter }}">{{ choice.choice_text }}</label><br>
        {% endfor %}
    </fieldset>
    <input type="submit" value="Vote">
</form>
- 이전에는 단순 리스트로 선택지가 출력이 되었었는데, 지금은 서버로 데이터를 보내기 위해 form태그와 input으로 바뀌었다.
- form태그의 속성을 보면 submit시 polls/vote/ 인 url로 post하라고 명시되어있다.
- 해당 페이지로 데이터를 전송하면, 그 페이지에서는 서버에 저장하는 작업을 해주면 된다.
- csrf_token : 해킹을 막기 위한 코드이다. form태그 안에 항상 넣어주는게 좋다
views의 vote함수 살펴보기
def vote(request, question_id):

		# 에러처리
    question = get_object_or_404(Question, pk=question_id)

	  # 에러가 없으면 try
    try:
				# 사용자 선택한 선택지가 갖고있는 질문Key값을 통해 question에서 질문 추출
        selected_choice = question.choice_set.get(pk=request.POST['choice'])

		except (KeyError, Choice.DoesNotExist):
				# 예외처리(선택지가 없을 떄) 다시 상세페이지로 이동 후 에러 메세지 전송
        return render(request, 'polls/detail.html', {
            'question': question,
            'error_message': "You didn't select a choice.",
        })
    else:
				# 데이터가 있는 경우 실행
        selected_choice.votes += 1
        selected_choice.save()
		    return HttpResponseRedirect(reverse('polls:results', args=(question.id,)))
- HttpResponseRedirect : POST와 세트. POST로 호출된 경우에 사용
- reverse : url하드코딩을 하지 않기 위해 사용. polls앱의 results view를 호출
result view와 template 생성
views.py 수정
vote 함수에서 polls/result 페이지를 열 때 args=(question.id,) 를 통해 질문 id값을 넘겨주게 된다
해당 내용을 result.html에도 같이 보내준다.
from django.shortcuts import get_object_or_404, render

def results(request, question_id):
    question = get_object_or_404(Question, pk=question_id)
    return render(request, 'polls/result.html', {'question': question})
result.html 생성
<h1>{{ question.question_text }}</h1>

<ul>
{% for choice in question.choice_set.all %}
    <li>{{ choice.choice_text }} -- {{ choice.votes }} vote{{ choice.votes|pluralize }}</li>
{% endfor %}
</ul>

<a href="{% url 'polls:detail' question.id %}">Vote again?</a>
- vote{{ choice.votes|pluralize }} : 단수/복수 처리 기능 (django의 기능)
완성 창을 확인해보자
어떤 선택지가 몇 번 투표됐는지 확인할 수 있다.
또한 1인 경우 단수처리, 0 또는 1이상일 경우에는 복수처리가 되도록 잘 셋팅되었다
반응형
'dev-log > python' 카테고리의 다른 글
| [python] Django Static file 연결 (0) | 2023.01.30 |
|---|---|
| [python] Django Generic View 사용하기 (0) | 2023.01.30 |
| [python] Django Database 사용 (0) | 2023.01.30 |
| [python] Django Admin Page (0) | 2023.01.30 |
| [python] Django API 사용하기 (0) | 2023.01.30 |
'dev-log/python' Related Articles
more


Comments