오식랜드
[css motion] button hover effect 본문
반응형
버튼 또는 div에 hover시 줄 수 있는 효과 6가지를 준비했다
별도의 스크립트 없이 오직 css로만 이루어지는 효과이니 유용하게 쓰일 듯 하다!
Demo : https://dudrbrb.github.io/etc/test/hoverEffect/
Document
Button 1 Button 2 Button 3 Button 4 Button 5 Button 6
dudrbrb.github.io
우선 html에 6개의 버튼을 셋팅해준다
<div class="container">
  <button class="btn1">Button 1</button>
  <button class="btn2">Button 2</button>
  <button class="btn3">Button 3</button>
  <button class="btn4">Button 4</button>
  <button class="btn5">Button 5</button>
  <button class="btn6">Button 6</button>
</div>
버튼들에 기본 css를 셋팅한 뒤 커스텀을 해주자
버튼 hover시에 가상 선택자 :before, :after 를 이용해서 효과를 줄 것이다
<style>
  body {
    background: #2e78cc;
    font-size: 62.5%;
  }

  .container {
    display: flex;
    flex-direction: column;
    justify-content: center;
    align-items: center;
  }

  button,
  button::after {
    -webkit-transition: all 0.3s;
    -moz-transition: all 0.3s;
    -o-transition: all 0.3s;
    transition: all 0.3s;
  }

  button {
    background: none;
    border: 3px solid #fff;
    border-radius: 5px;
    color: #fff;
    display: block;
    font-size: 1.6em;
    font-weight: bold;
    margin: 1em auto;
    padding: 2em 6em;
    position: relative;
    text-transform: uppercase;
  }

  button::before,
  button::after {
    background: #fff;
    content: '';
    position: absolute;
    z-index: -1;
  }

  button:hover {
  	color: #2e78cc;
  }
</style>
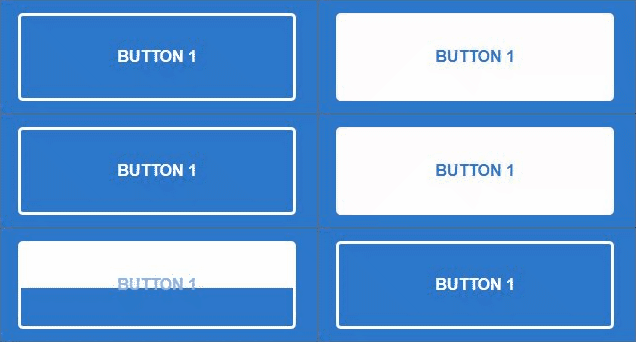
Effect1 : 상 → 하

<style>
/* BUTTON 1 */
.btn1::after {
  height: 0;
  left: 0;
  top: 0;
  width: 100%;
}

.btn1:hover:after {
  height: 100%;
}
</style>
Effect2 : 좌 -> 우

<style>
/* BUTTON 2 */
.btn2::after {
  height: 100%;
  left: 0;
  top: 0;
  width: 0;
}

.btn2:hover:after {
  width: 100%;
}
</style>
Effect3 : 안 → 밖

<style>
/* BUTTON 3 */
.btn3::after {
  height: 0;
  left: 50%;
  top: 50%;
  width: 0;
}

.btn3:hover:after {
  height: 100%;
  left: 0;
  top: 0;
  width: 100%;
}
</style>
Effect4 : 밖 → 안

<style>
/* BUTTON 4 */
.btn4::before {
  height: 100%;
  left: 0;
  top: 0;
  width: 100%;
}

.btn4::after {
  background: #2e78cc;
  height: 100%;
  left: 0;
  top: 0;
  width: 100%;
}

.btn4:hover:after {
  height: 0;
  left: 50%;
  top: 50%;
  width: 0;
}
</style>
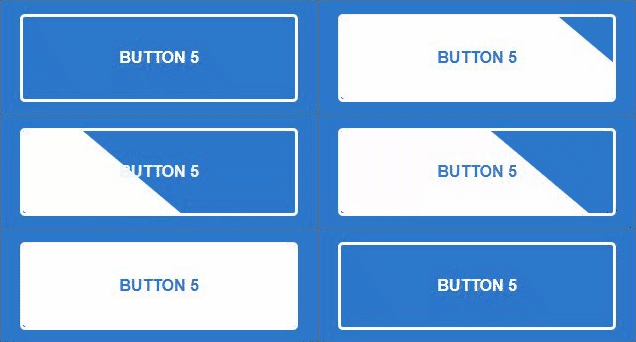
Effect5 : 사선 배경

<style>
/* BUTTON 5 */
.btn5 {
  overflow: hidden;
}

.btn5::after {
  height: 100%;
  left: -35%;
  top: 0;
  transform: skew(50deg);
  transition-duration: 0.6s;
  transform-origin: top left;
  width: 0;
}

.btn5:hover:after {
  height: 100%;
  width: 135%;
}
</style>
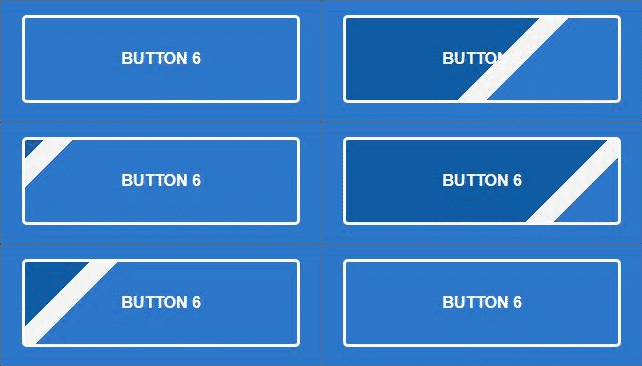
Effect6 : 사선 이펙트 배경

<style>
/* BUTTON 6 */
.btn6 {
  background: linear-gradient(
  -45deg,
  #2e78cc 0 calc(50% - 10px),
  #F5F5F5 calc(50% - 10px) calc(50% + 10px),
  #105da5 calc(50% + 10px) 100%
  );
  background-size: 250% 100%;
  background-position: 100% 50%;
}

.btn6:hover {
  color: #f5f5f5;
  background-position: 0% 50%;
}
</style>
반응형
'dev-log > html·css·js' 카테고리의 다른 글
| [javascript] new Date()를 이용해 현재 날짜, 시간 불러오기 (0) | 2021.05.28 |
|---|---|
| [javascript] D-Day 계산기 만들기 (0) | 2021.05.28 |
| [javascript] html 페이지에 bgm 추가하기 (0) | 2021.05.21 |
| [javascript] 요소의 순서 구하기 (0) | 2021.05.21 |
| [javascript] addClass, removeClass, toggleClass, hasClass (0) | 2021.05.21 |
Comments


